V2Ray 安装
V2Ray 提供了一个在 Linux 中的自动化安装脚本。这个脚本会自动检测有没有安装过 V2Ray,如果没有,则进行完整的安装和配置;如果之前安装过 V2Ray,则只更新 V2Ray 二进制程序而不更新配置。
以下指令假设已在 su 环境下,如果不是,请先运行 sudo su。
运行下面的指令下载并安装 V2Ray。当 yum 或 apt-get 可用的情况下,此脚本会自动安装 unzip 和 daemon。这两个组件是安装 V2Ray 的必要组件。如果你使用的系统不支持 yum 或 apt-get,请自行安装 unzip 和 daemon。
1
| bash <(curl -L -s https://install.direct/go.sh)
|
此脚本会自动安装以下文件:
/usr/bin/v2ray/v2ray:V2Ray 程序/etc/v2ray/config.json:配置文件
此脚本会配置自动运行脚本。自动运行脚本会在系统重启之后,自动运行 V2Ray。目前自动运行脚本只支持带有 Systemd 的系统,以及 Debian / Ubuntu 全系列。
运行脚本位于系统的以下位置:
/lib/systemd/system/v2ray.service:Systemd/etc/init.d/v2ray:SysV
脚本运行完成后,你需要:
- 编辑
/etc/v2ray/config.json 文件来配置你需要的代理方式;
- 运行
service v2ray start 来启动 V2Ray 进程;
- 之后可以使用
service v2ray start|stop|status|reload|restart|force-reload 控制 V2Ray 的运行。
V2Ray 配置
V2Ray 共有三种传输方式,可以形成三种使用方案。
TCP 模式(支持 TLS)
使用TCP来传输,这种方式和其它代理应用模式上差不多。TCP 模式可以使用 HTTP/TLS 混淆来模拟 HTTP 网站流量,但也只是模拟,并不是真实的 HTTP 流量。
header 项是关于数据包伪装的设置,可自定义合理的内容,但要确保服务器与客户端一致
服务器配置
1
2
3
4
5
6
7
8
9
10
11
12
13
14
15
16
17
18
19
20
21
22
23
24
25
26
27
28
29
30
31
32
33
34
35
36
37
38
39
40
41
42
43
44
45
46
47
48
49
50
51
52
53
54
55
56
57
58
59
60
61
62
63
64
65
66
67
68
69
70
71
72
73
74
75
76
77
78
| {
"log" : {
"access": "/var/log/v2ray/access.log",
"error": "/var/log/v2ray/error.log",
"loglevel": "warning"
},
"inbound": {
"port": 443,
"protocol": "vmess",
"settings": {
"clients": [
{
"id": "b831381d-6324-4d53-ad4f-8cda48b30811",
"level": 1,
"alterId": 64
}
]
},
"streamSettings": {
"network": "tcp",
"tcpSettings": {
"header": {
"type": "http",
"response": {
"version": "1.1",
"status": "200",
"reason": "OK",
"headers": {
"Content-Type": ["application/octet-stream", "application/x-msdownload", "text/html", "application/x-shockwave-flash"],
"Transfer-Encoding": ["chunked"],
"Connection": ["keep-alive"],
"Pragma": "no-cache"
}
}
}
}
}
},
"outbound": {
"protocol": "freedom",
"settings": {}
},
"outboundDetour": [
{
"protocol": "blackhole",
"settings": {},
"tag": "blocked"
}
],
"routing": {
"strategy": "rules",
"settings": {
"rules": [
{
"type": "field",
"ip": [
"0.0.0.0/8",
"10.0.0.0/8",
"100.64.0.0/10",
"127.0.0.0/8",
"169.254.0.0/16",
"172.16.0.0/12",
"192.0.0.0/24",
"192.0.2.0/24",
"192.168.0.0/16",
"198.18.0.0/15",
"198.51.100.0/24",
"203.0.113.0/24",
"::1/128",
"fc00::/7",
"fe80::/10"
],
"outboundTag": "blocked"
}
]
}
}
}
|
客户端配置
1
2
3
4
5
6
7
8
9
10
11
12
13
14
15
16
17
18
19
20
21
22
23
24
25
26
27
28
29
30
31
32
33
34
35
36
37
38
39
40
41
42
43
44
45
46
47
48
49
50
51
52
53
54
55
56
57
58
59
60
61
62
63
64
65
66
67
68
69
70
71
72
73
74
75
76
77
78
79
80
81
82
83
84
85
86
87
88
89
90
91
92
93
94
95
96
| {
"log": {
"loglevel": "warning"
},
"inbound": {
"port": 1080,
"protocol": "socks",
"settings": {
"auth": "noauth"
}
},
"outbound": {
"protocol": "vmess",
"settings": {
"vnext": [
{
"address": "serveraddr.com",
"port": 443,
"users": [
{
"id": "b831381d-6324-4d53-ad4f-8cda48b30811",
"alterId": 64
}
]
}
]
},
"streamSettings": {
"network": "tcp",
"tcpSettings": {
"header": {
"type": "http",
"request": {
"version": "1.1",
"method": "GET",
"path": ["/"],
"headers": {
"Host": ["itunes.apple.com"],
"User-Agent": [
"Mozilla/5.0 (Windows NT 10.0; WOW64) AppleWebKit/537.36 (KHTML, like Gecko) Chrome/55.0.2883.75 Safari/537.36",
"Mozilla/5.0 (iPhone; CPU iPhone OS 10_0_2 like Mac OS X) AppleWebKit/601.1 (KHTML, like Gecko) CriOS/53.0.2785.109 Mobile/14A456 Safari/601.1.46"
],
"Accept-Encoding": ["gzip, deflate"],
"Connection": ["keep-alive"],
"Pragma": "no-cache"
}
}
}
}
}
},
"outboundDetour": [
{
"protocol": "freedom",
"settings": {},
"tag": "direct"
}
],
"routing": {
"strategy": "rules",
"settings": {
"domainStrategy": "IPIfNonMatch",
"rules": [
{
"type": "field",
"ip": [
"0.0.0.0/8",
"10.0.0.0/8",
"100.64.0.0/10",
"127.0.0.0/8",
"169.254.0.0/16",
"172.16.0.0/12",
"192.0.0.0/24",
"192.0.2.0/24",
"192.168.0.0/16",
"198.18.0.0/15",
"198.51.100.0/24",
"203.0.113.0/24",
"::1/128",
"fc00::/7",
"fe80::/10"
],
"outboundTag": "direct"
},
{
"type": "chinasites",
"outboundTag": "direct"
},
{
"type": "chinaip",
"outboundTag": "direct"
}
]
}
}
}
|
WebSocket 模式 (支持 TLS)
WebSocket 是一种在 HTTP 之上的协议,本质也是TCP传输,但是是天然的 HTTP 网站流量。并且可以搭配各种 HTTP 服务器(比如 Nginx, Caddy)一起使用。
因为 WebSocket 已经是 HTTP 的一种,所以并不需要任何伪装(混淆)。
这里主要需要一个 Nginx 作为反代,比较熟悉的人直接 apt-get/yum 安装 Nginx 就好,可以跳过这一步。但是 LNMP 作为解决方案对小白来说比较友好。
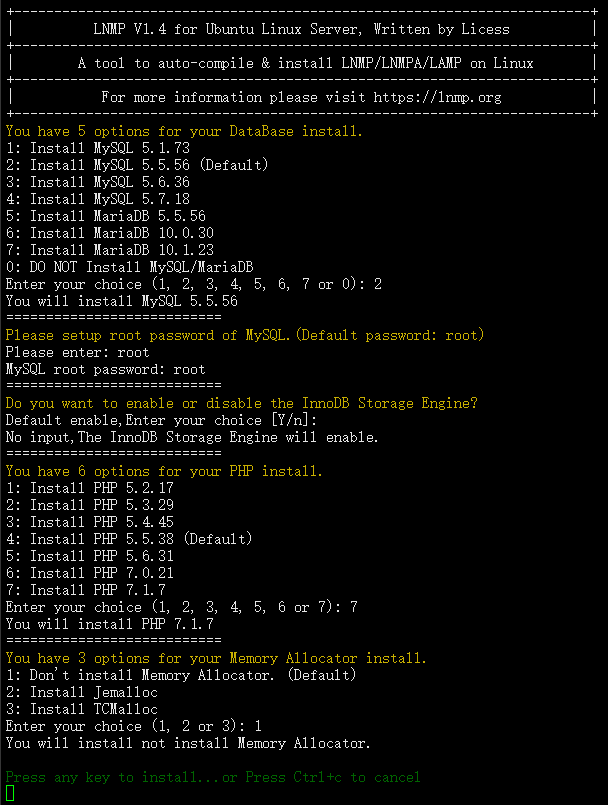
LNMP 1.4 版 代码来源 https://lnmp.org/ 。
由于 LNMP 安装时间很长,所以我们先运行一下 screen。这样如果发生中断,可以重新连接 VPS 用 screen -r 来恢复之前的安装而不至于被中断。
安装代码 wget -c http://soft.vpser.net/lnmp/lnmp1.4.tar.gz && tar zxf lnmp1.4.tar.gz && cd lnmp1.4 && ./install.sh lnmp。
建一个虚拟机 lnmp vhost add。
根据自己需求配置,推荐选项只适合本文开启 V2Ray 的 WS 模式。
输入 VPS 绑定的域名,以 www.serveraddr.com 为例;
没有其他的域名直接回车,也可以加个无 www 版本 serveraddr.com;
默认目录,直接回车;
重写规则,选 n;
是否开启 log,选 n;
是否创建数据库,选 n;
是否添加 SSL,推荐选 y,选择 2 使用 Let’s Encrypt 自动签发证书;
输入自己邮箱
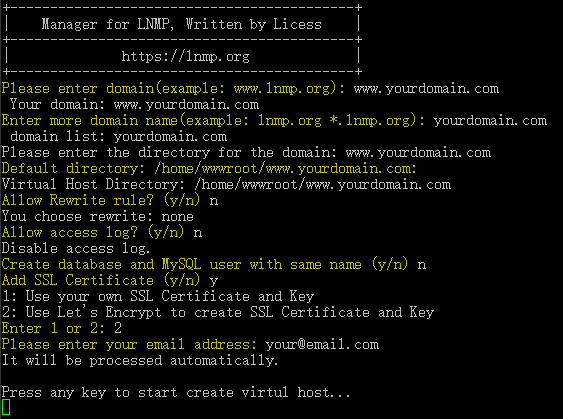
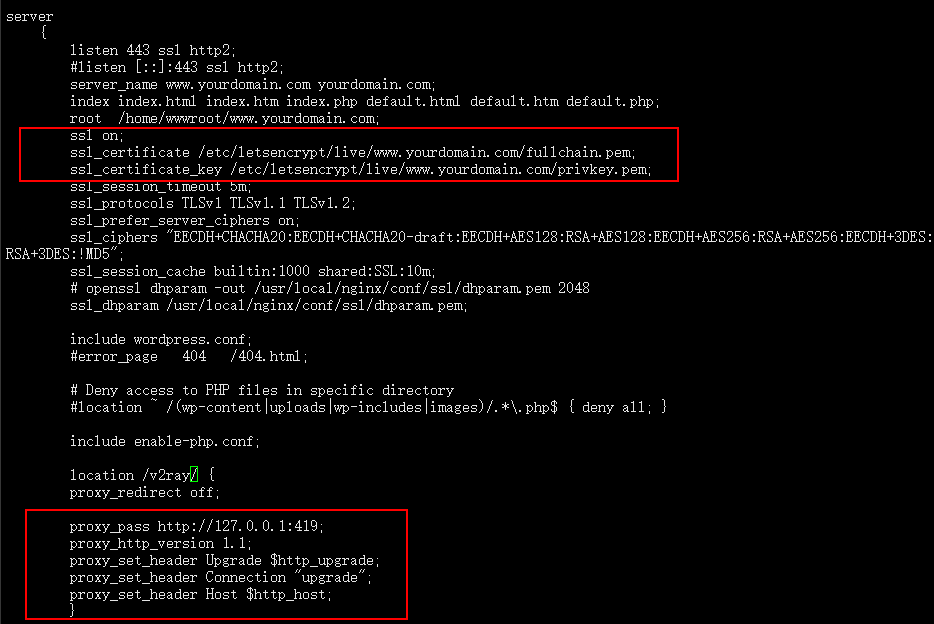
任意键开始建立网站虚拟机。虚拟机建好后,我们需要修改 Nginx 的配置。LNMP 安装的 Nginx 配置文件位于 /usr/local/nginx/conf/vhost 目录下,文件名为 www.serveraddr.com.conf。
打开这个文件 vi /usr/local/nginx/conf/vhost/www.serveraddr.com.conf,在 server 443 端口中添加一段:
1
2
3
4
5
6
7
8
| location /v2ray/ {
proxy_redirect off;
proxy_pass http://127.0.0.1:10000;
proxy_http_version 1.1;
proxy_set_header Upgrade $http_upgrade;
proxy_set_header Connection "upgrade";
proxy_set_header Host $http_host;
}
|
将网站目录 /v2ray/ 目录的数据全部转发到本地 10000 端口,之后配置的 V2Ray 需要监听这个端口。保存退出后,重启 Nginx:service nginx restart。
服务器配置
1
2
3
4
5
6
7
8
9
10
11
12
13
14
15
16
17
18
19
20
21
22
23
24
25
| {
"inbound": {
"port": 10000,
"listen":"127.0.0.1",
"protocol": "vmess",
"settings": {
"clients": [
{
"id": "b831381d-6324-4d53-ad4f-8cda48b30811",
"alterId": 64
}
]
},
"streamSettings":{
"network":"ws"
"wsSettings": {
"path": "/v2ray/"
}
}
},
"outbound": {
"protocol": "freedom",
"settings": {}
}
}
|
客户端配置
1
2
3
4
5
6
7
8
9
10
11
12
13
14
15
16
17
18
19
20
21
22
23
24
25
26
27
28
29
| {
"inbound": {
"port": 1080,
"protocol": "socks",
"settings": {
"auth": "noauth"
}
},
"outbound": {
"protocol": "vmess",
"settings": {
"vnext": [
{
"address": "serveraddr.com",
"port": 443,
"users": [
{
"id": "b831381d-6324-4d53-ad4f-8cda48b30811",
"alterId": 64
}
]
}
]
},
"streamSettings":{
"network":"ws"
}
}
}
|
mKCP 模式
使用 UDP 来传输,mKCP是以流量换速度,就是多倍发包,同一份数据发多份,防止丢包重传,所以同一条件下使用mKCP会比其他方式耗费更多流量,不建议手机4G使用。
由于BT下载、游戏、以及视频聊天等也都是使用 UDP 传输,所以这种模式下可以伪装成 BT下载流量、FaceTime 流量、微信视频流量。
由于 BBR 是 TCP 加速技术,所以使用 mKCP 并不能享受 BBR 的加速,不过 mKCP 本身就是一种加速技术了,也并不需要 BBR。
服务器配置
1
2
3
4
5
6
7
8
9
10
11
12
13
14
15
16
17
18
19
20
21
22
23
24
25
26
27
28
29
30
31
32
33
| {
"inbound": {
"port": 443,
"protocol": "vmess",
"settings": {
"clients": [
{
"id": "b831381d-6324-4d53-ad4f-8cda48b30811",
"alterId": 64
}
]
},
"streamSettings":{
"network":"kcp",
"kcpSettings": {
"mtu": 1350,
"tti": 20,
"uplinkCapacity": 5,
"downlinkCapacity": 100,
"congestion": false,
"readBufferSize": 1,
"writeBufferSize": 1,
"header": {
"type": "none"
}
}
}
},
"outbound": {
"protocol": "freedom",
"settings": {}
}
}
|
客户端配置
1
2
3
4
5
6
7
8
9
10
11
12
13
14
15
16
17
18
19
20
21
22
23
24
25
26
27
28
29
30
31
32
33
34
35
36
37
38
39
40
41
| {
"inbound": {
"port": 1080,
"protocol": "socks",
"settings": {
"auth": "noauth"
}
},
"outbound": {
"protocol": "vmess",
"settings": {
"vnext": [
{
"address": "serveraddr.com",
"port": 443,
"users": [
{
"id": "b831381d-6324-4d53-ad4f-8cda48b30811",
"alterId": 64
}
]
}
]
},
"streamSettings":{
"network":"kcp",
"kcpSettings": {
"mtu": 1350,
"tti": 20,
"uplinkCapacity": 5,
"downlinkCapacity": 100,
"congestion": false,
"readBufferSize": 1,
"writeBufferSize": 1,
"header": {
"type": "none"
}
}
}
}
}
|
在上面的配置当中,与之前相比主要的变化在于多了一个 streamSettings,包含有不少参数:
network: 网络的选择,要像上面的配置写成 kcp 才会启用 mKCPkcpSettings: 包含一些关于 mKCP 设置的参数,有
uplinkCapacity: 上行链路容量,将决定 V2Ray 向外发送数据包的速率。单位为 MBdownlinkCapacity:下行链路容量,将决定 V2Ray 接收数据包的速率。单位同样是 MBheader:对于数据包的伪装
客户端的上行对于服务器来说是下行,同样地客户端的下行是服务器的上行,mKCP 设置当中服务器和客户端都有 uplinkCapacity 和 downlinkCapacity,所以客户端的上传速率由服务器的 downlinkCapacity 和客户端的 uplinkCapacity 中的最小值决定,客户端的下载速率也是同样的道理。因此,建议将服务器和客户端的 downlinkCapacity 设成一个很大的值,然后分别修改两端的 uplinkCapacity 以调整上下行速率。
还有一个 header 参数可以对 mKCP 进行伪装,这是 mKCP 的一个优势。具体的伪装在 type 参数设置,type 可以设置成 utp、srtp、wechat-video 或者 none,这四个可以分别将 mKCP 数据伪装成 BT 下载、视频通话、微信视频通话以及不进行伪装。这里的 type 参数,客户端与服务器要一致。